Installation Information

Installaton

The mesh is always supplied with the necessary mounting aids. In addition to the cable mesh, we always supply sufficient ty-raps, connection clamps and lacing cable. With these items you can attach the nets to the edge construction. That is usually a cable or a frame. Below you can read step by step how to tension the nets in a rectangular construction. An extensive manual can be viewed here (pdf 3mb).

Included material

samenstelling-net

Assembly in a nutshell

1. Completely prepare the balustrade and provide it with the tubular frame or the peripheral cables
2. Unpack Carl Stahl's Box
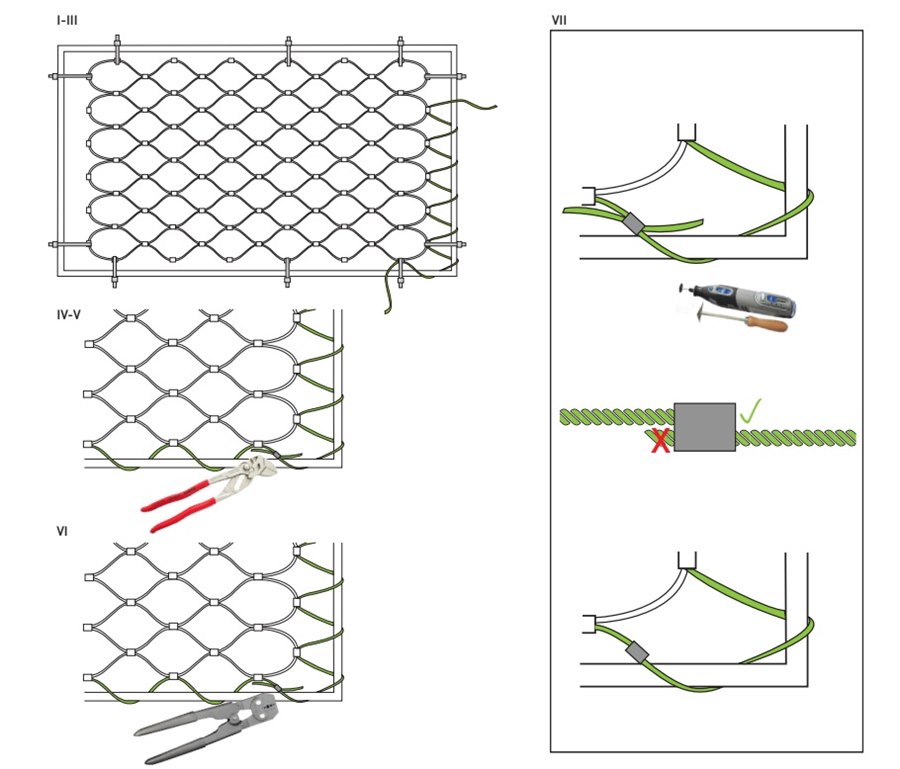
3. Secure the net with the ty-raps between the edge construction
a. The net is in principle not too long, so do not cut it!!
b. Start with two ty-raps in each corner
c. When the net hangs in the four corners, install the intermediate ty-raps
d. Continue until every 5-6 meshes hangs with a ty-rap
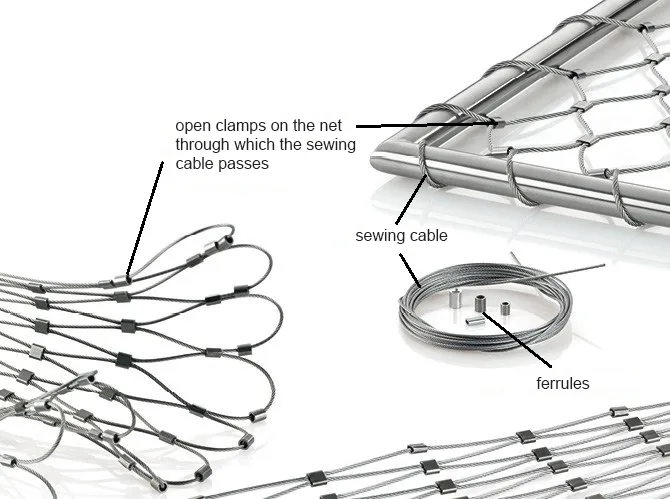
4. Start stringing the cable
a. Do not make the ring cable longer than 5 meters. Extend if necessary.
5. When you get back to the starting point, connect the ring cable together

Installation in photos

montage-rechthoekig-kabelnet

Installation tools

For mounting the nets in balustrades, crimping pliers (with flat jaws) are required for squeezing the clamps closed and cutting pliers for cutting the stringer cable. Our technicians have special savapress pliers for extending the lacing cable. This clamp guarantees a strong connection of the clamp. We also recommend that you always grind off the sharp edges with a dremel. We always have these tools in stock for you.
gereedschappen

Questions?

Many more situations are described in our extensive manual. Think of sloping sides along a staircase or shortening a cable net. Click here to download the 6mb pdf. You can of course always contact us to discuss it.

great things
are built
with
the best materials
.

contact